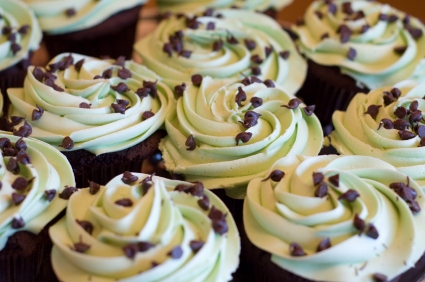
My favourite flavour of ice cream or sweets has to be anything which includes mint and chocolate! . Here is what I have come up with…
For the Cake:
250g Caster sugar
250g Unsalted butter at room temperature or I prefer to use Stork as it is much softer
250g Self raising flour
4 Medium eggs
5tbsp Good quality cocoa powder
1 ½ tsp Mint essence
120g of Plain chocolate chips
For the icing:
1 ½ tsp Mint essence
150g Plain chocolate chips
250g Unsalted Butter (lurpak is the best)
1 tsp Natural green colouring, gel colouring is usually the best as it does not change the structure and thickness of the icing. Increase amount until you get the perfect minty colour.
500g Icing sugar (sieved)
6-8 tbsp Milk
Cake Method
Firstly set the oven to 160 Degrees Celsius and line a baking tray with non-waxed cupcake or muffin liners. I like to use muffin liners as they turn out a little bit bigger. In a bowl sieve the flour, and then add the baking powder and the cocoa mix with a spoon until well combined, set aside to use later on in this process. In a separate bowl mix the butter/stork, for 2 minutes until the mixture turns pale, ensure that you scrape down the sides of the bowl whilst mixing as you want to make sure all the stork turns pale, as opposed to having lumpy yellow bits. After 2 minutes add the sugar and mix well until the texture becomes pale and fluffy. Add the eggs one at a time to the butter and sugar mix ensuring that you mix the entire egg in before you add the next one. Once the eggs have been fully incorporated, add the mint essence using the electric mixer. Now it is time to add the flour concoction. It is very important that you do as little mixing as possible, so use a large wooden spoon and fold the flour into the mixture. Add the chocolate chips but DO NOT mix more than you have to, so once the flour has been evenly spread, it is time to spoon your mixture into the cupcake holders. Make sure that you only fill your cupcake liners half way so that it gives the mixture ample space to rise. Once you have filled the cupcake liners, place them into the oven for 18-25 minutes. Check your cakes at the 18minute mark as if you open the oven before this time, this can cause the cupcakes to sink in the middle and ruin the structure of your cupcakes. Once the cupcakes are cooked, you will be able to insert a skewer into the centre of each cupcake and pull it out clean. Once the skewer is clean, take out your baking tray and leave the cupcakes to set for 10 minutes in the baking tray. After 10 minutes remove the cakes and place them on a wire rack to cool. Once they are cold, then it is time to ice them.
Icing Method
Place the butter into a bowl and mix until it turns a pale colour and the texture thickens. This can take anywhere between 2-5 minutes of mixing so using an electric mixer is encouraged. Make sure you scrape down the sides and mix again for another minute. Once the butter has been mixed well, into a glass, place the milk and the mint essence and leave to one side. Add the icing sugar and BEWARE, if you put your mixer onto a high setting, this can cause the icing sugar to spray everywhere covering not only yourself in a white film of sugar but also every surface of your kitchen so set your mixer to the slowest setting and carefully add your icing sugar to the mixture 1/3 at a time. Once the icing sugar has been mixed in well, add the essence and milk mixture slowly, mixing well with each addition. The addition of the milk will loosen up the mixture otherwise it might be too thick. Once the mixture begins to look like butter cream, add 1tsp of green food colouring gel (make sure you do not use liquid/runny food colouring as this can change the texture and consistency of the icing and make it runny. Mix In the food colouring until the butter cream has turned the perfect mint colour. Then pipe onto the cakes, or spread on with a spoon. Finish the cupcakes off with a sprinkling of chocolate chips or chocolate sprinkles.
Enjoy these incredible masterpieces as either a dessert or for afternoon tea! Bon Appetite!

Leave a Reply